Before and After: Yacht Interior Design Makeover 1

Saltwater Journal is reader supported.
When you buy through our links we may earn an affiliate commission (at no extra cost to you)
Buying our first boat and having 100% freedom to create an interior look and feel that we love was one of the things I was most looking forward to when we moved aboard in 2017.
SV Spectrum had lovely natural light but the interior was a bit grubby and dated. We knew it wouldn’t take much to freshen her up and make her over into a cosy home — so here’s how we did it! And we’ve done it on a budget — so if you’re looking for inspiration to make a small space feel good for less, read on to see how simple it can be. And if you’ve got a dark boat interior, make sure you check out my extra tips to help your space feel bigger and lighter.
Here’s our 7 simple steps for giving your old boat interior a make-over on a budget of less than $500NZD ($350 USD).
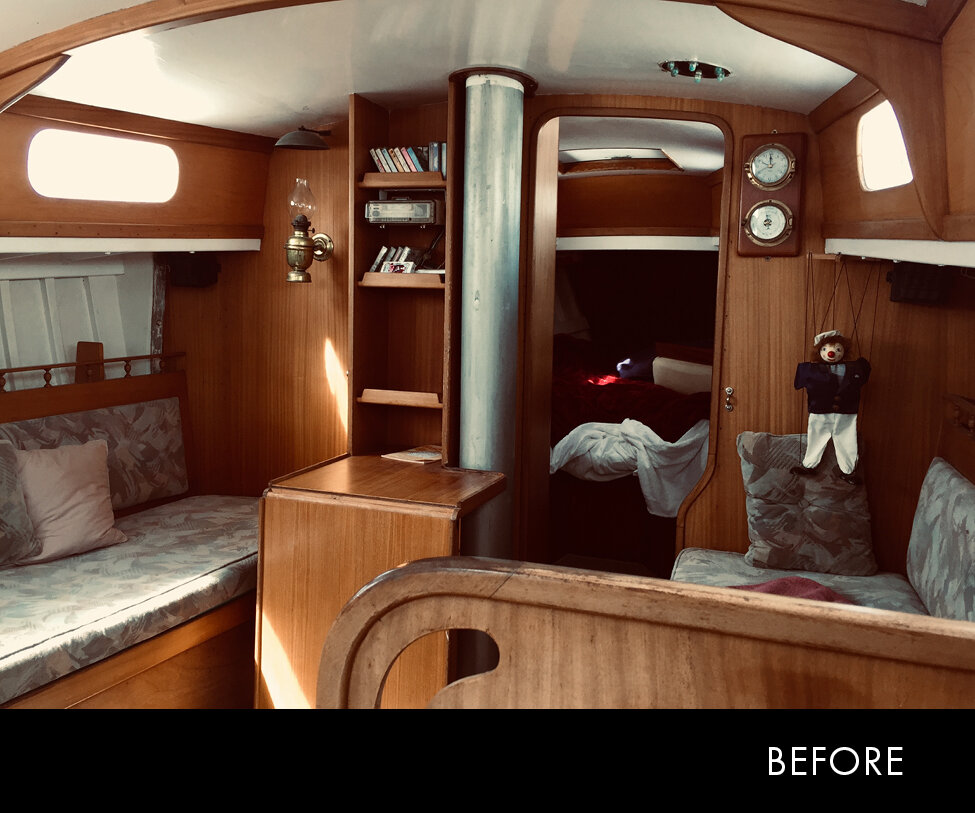
Before: An old cassette tape player and semi-creepy puppet we inherited onboard our yacht were kindly rehomed in our clear out.
Step 1: Clear everything out.
If you’re like us, the boat you’ve bought came “as is” with a lot of items left onboard that you won't necessarily want to keep. The first thing you’ll want to do is have a big clear out.
Take everything off the boat and sort three piles:
Rubbish
Junk
Keep
The rubbish you’ll get rid of (recycle as much as you can). The junk pile may be another person’s treasure — so display this in the Marina as a “free bin” or advertise on local sailing Facebook group sites for someone to snap up. You might have just the thing someone’s been looking for! And put the things to keep to the side while you get to work — these will have a clean home to go back to soon.
Now, while the boat is cleared out you can get to work with the Step 2.
Total cost: FREE
Pro tip:
If you find an object/fitting/random looking tool/bit don’t rubbish or junk it until you’ve identified it. There’s plenty of people in a marina that will let you know if it’s important to keep or not but you don’t want to throw away something you might well need.
Step 2: Deep clean.
Before making any decisions about how you’re going to revamp the interior, it’s a great idea to give the boat a good deep clean. This isn’t going to cost a lot but it will require elbow grease and sweat!
Total cost: $5 (+ wine)
Pro tip:
Don’t try and do all the cleaning at once (I tried and failed in a sweaty heap of “there’s too much to do”. Depending on how grubby it is, I recommend doing it in stages, or one area at a time. Crank the music, rope in a friend and enjoy a cold wine at the end of the day.
Step 3: Feature the wood (instead of an all wood feature).
If you ask boaties the question ‘how much wood is too much wood?’ there will typically be two groups of answers — those that love the all wood look (the more the better), and those that like to mix it up with a modern twist.
I’m unlikely to paint over beautiful native timber, but when we were faced with all the bulkheads in a dated looking varnished plywood, I was super keen to knock it back a bit. So we painted the bulkheads and left the wooded trims, ceiling beams and window surrounds as features.
Painting in a small space was more hard work than I thought it would be. There’s tight corners, tricky angles to contort your body into, and a lot of masking edges and small brush work. So it’s worth taking your time and doing regular stretches throughout.
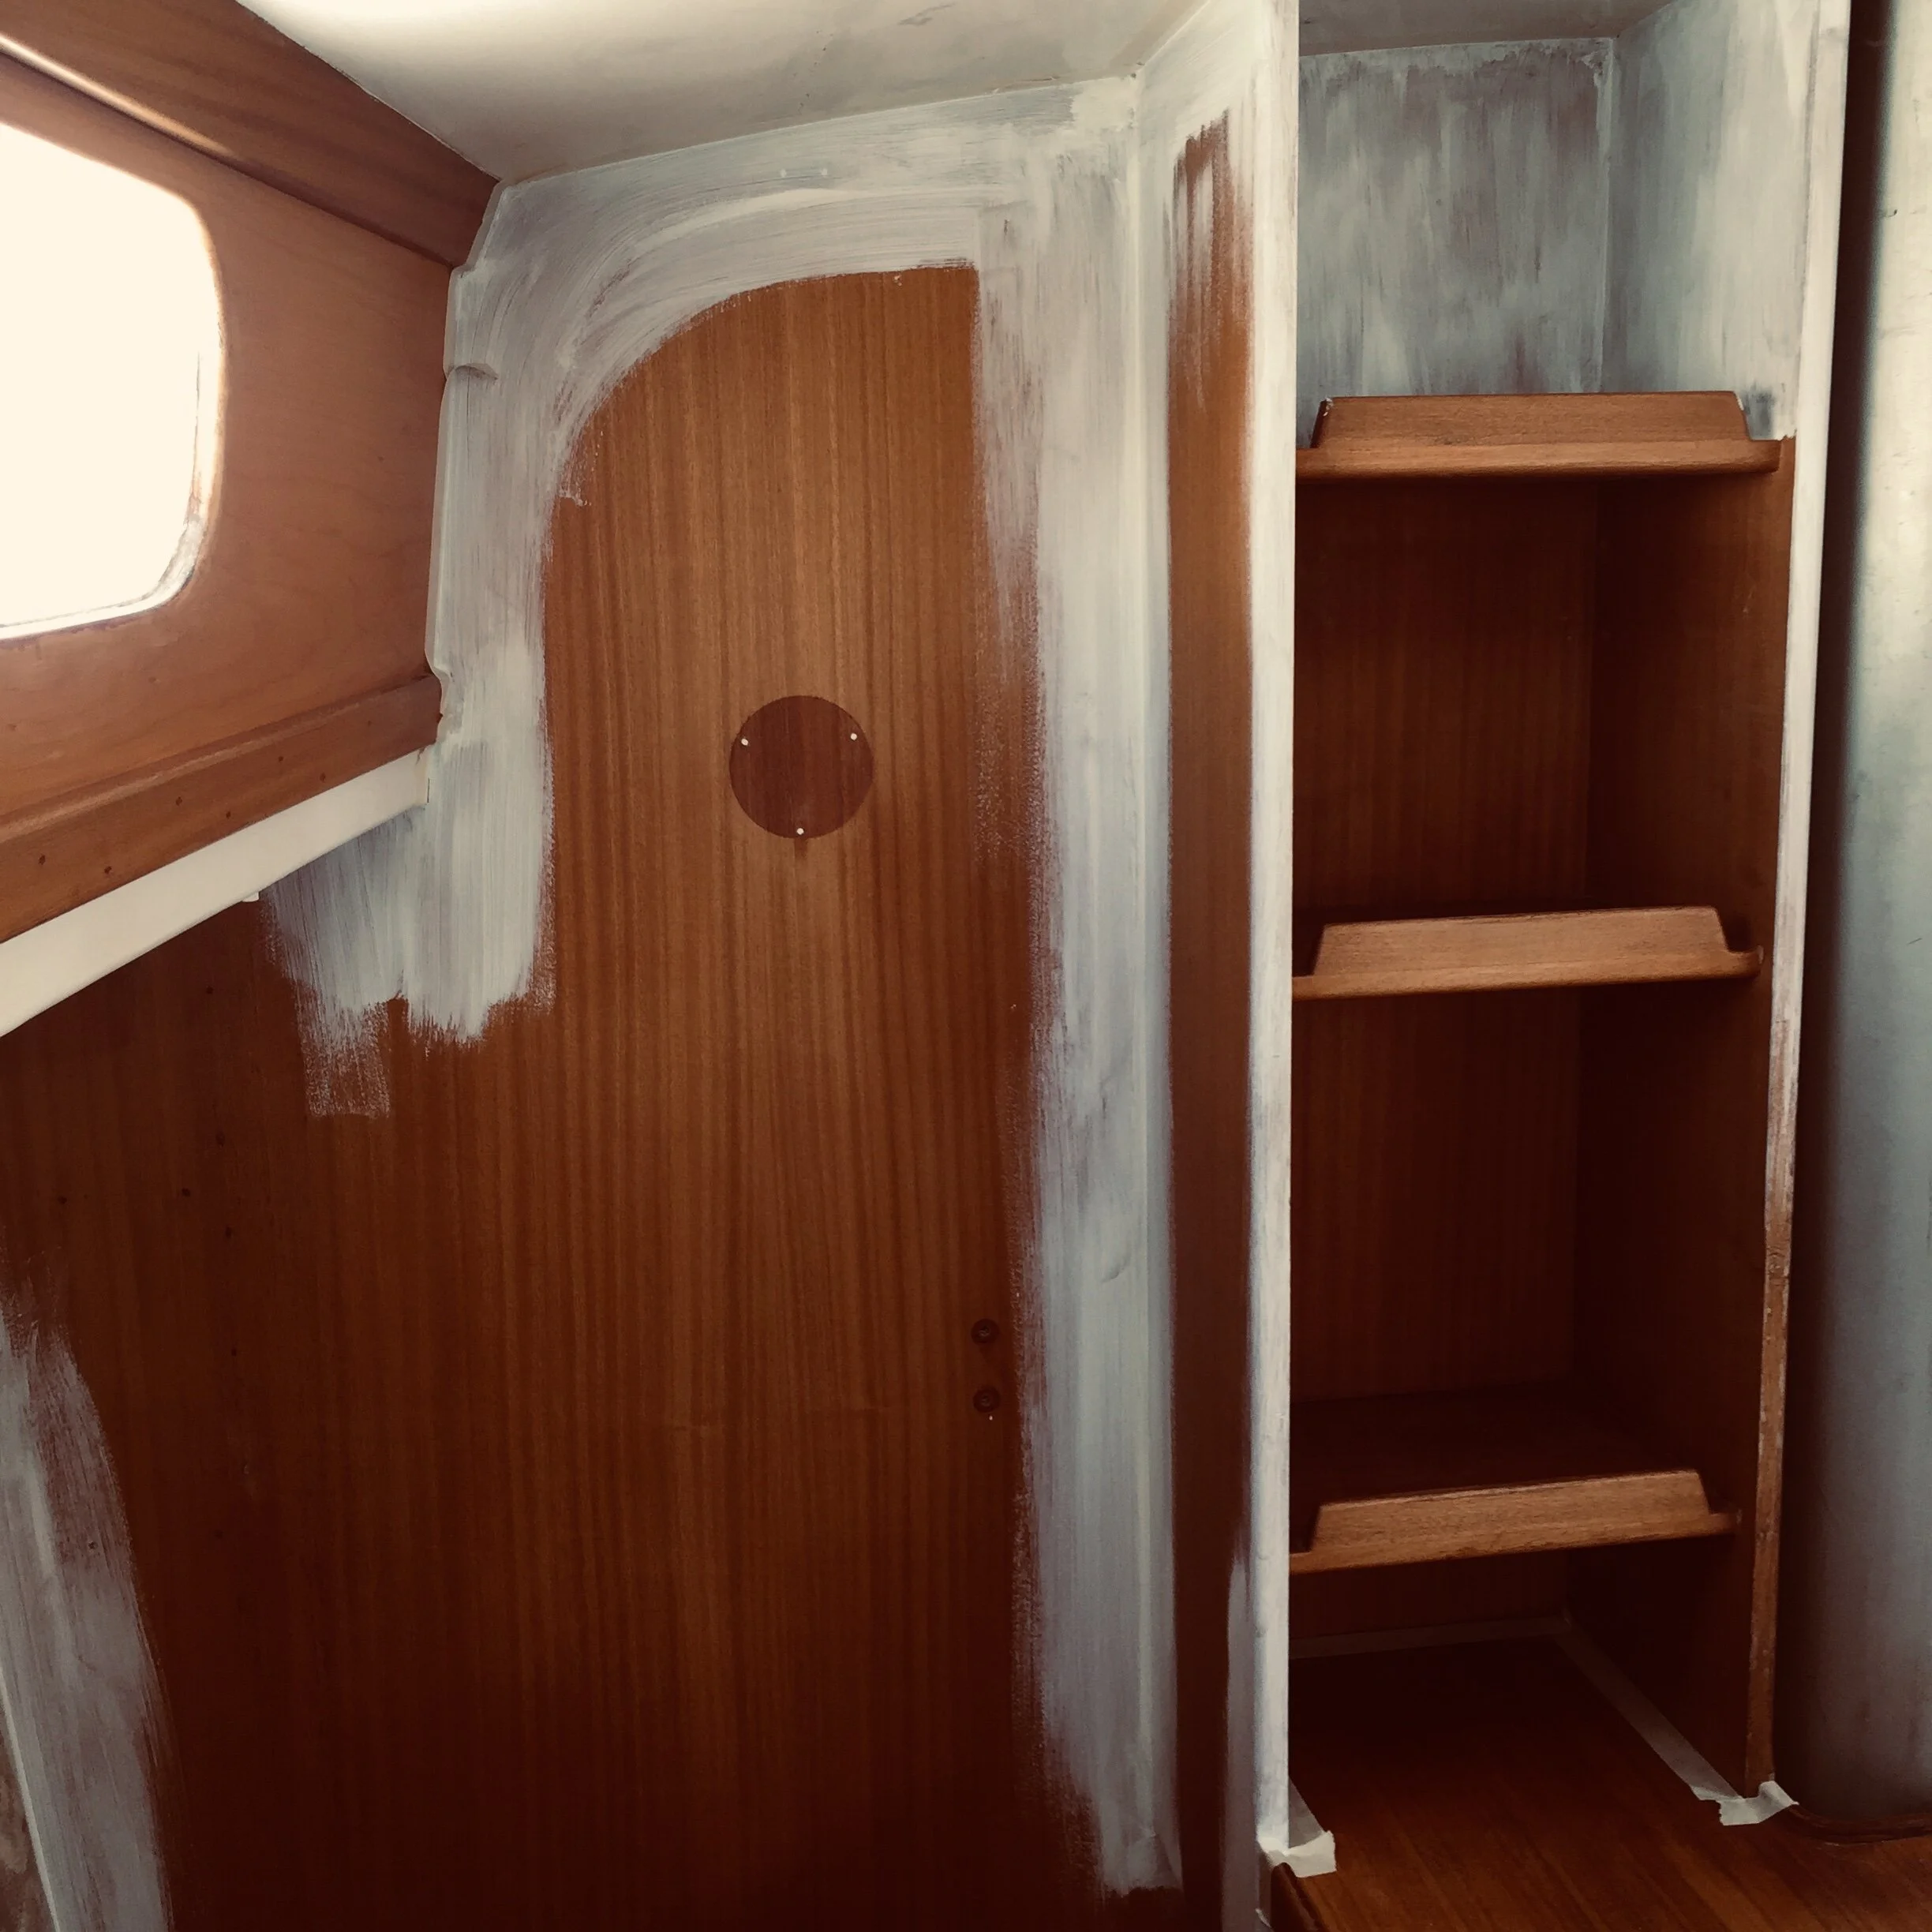
Edges masked up with tape, and cutting in with the bush the first of two primer coats.

A small roller is handy for even coverage on flat surfaces. Don’t panic if the first primer coat looks a bit patchy — the second coat will even it out!
A great paint result with a lasting finish is all about the preparation, so make sure you take care to:
Clean the surface well — sugar soap wipes are great at getting rid of grease, dirt and salt buildup
Sand well
Fill any small holes with wood/wall filler
Mask your edges carefully
Use a good primer (we used two coats since it was being applied to a sanded varnish surface)
Wear a mask and/or keep as much airflow/ventilation going as possible
Choose a paint that’s durable and good in wet areas.

Chalkboard paint gave us a fun way to leave messages onboard.
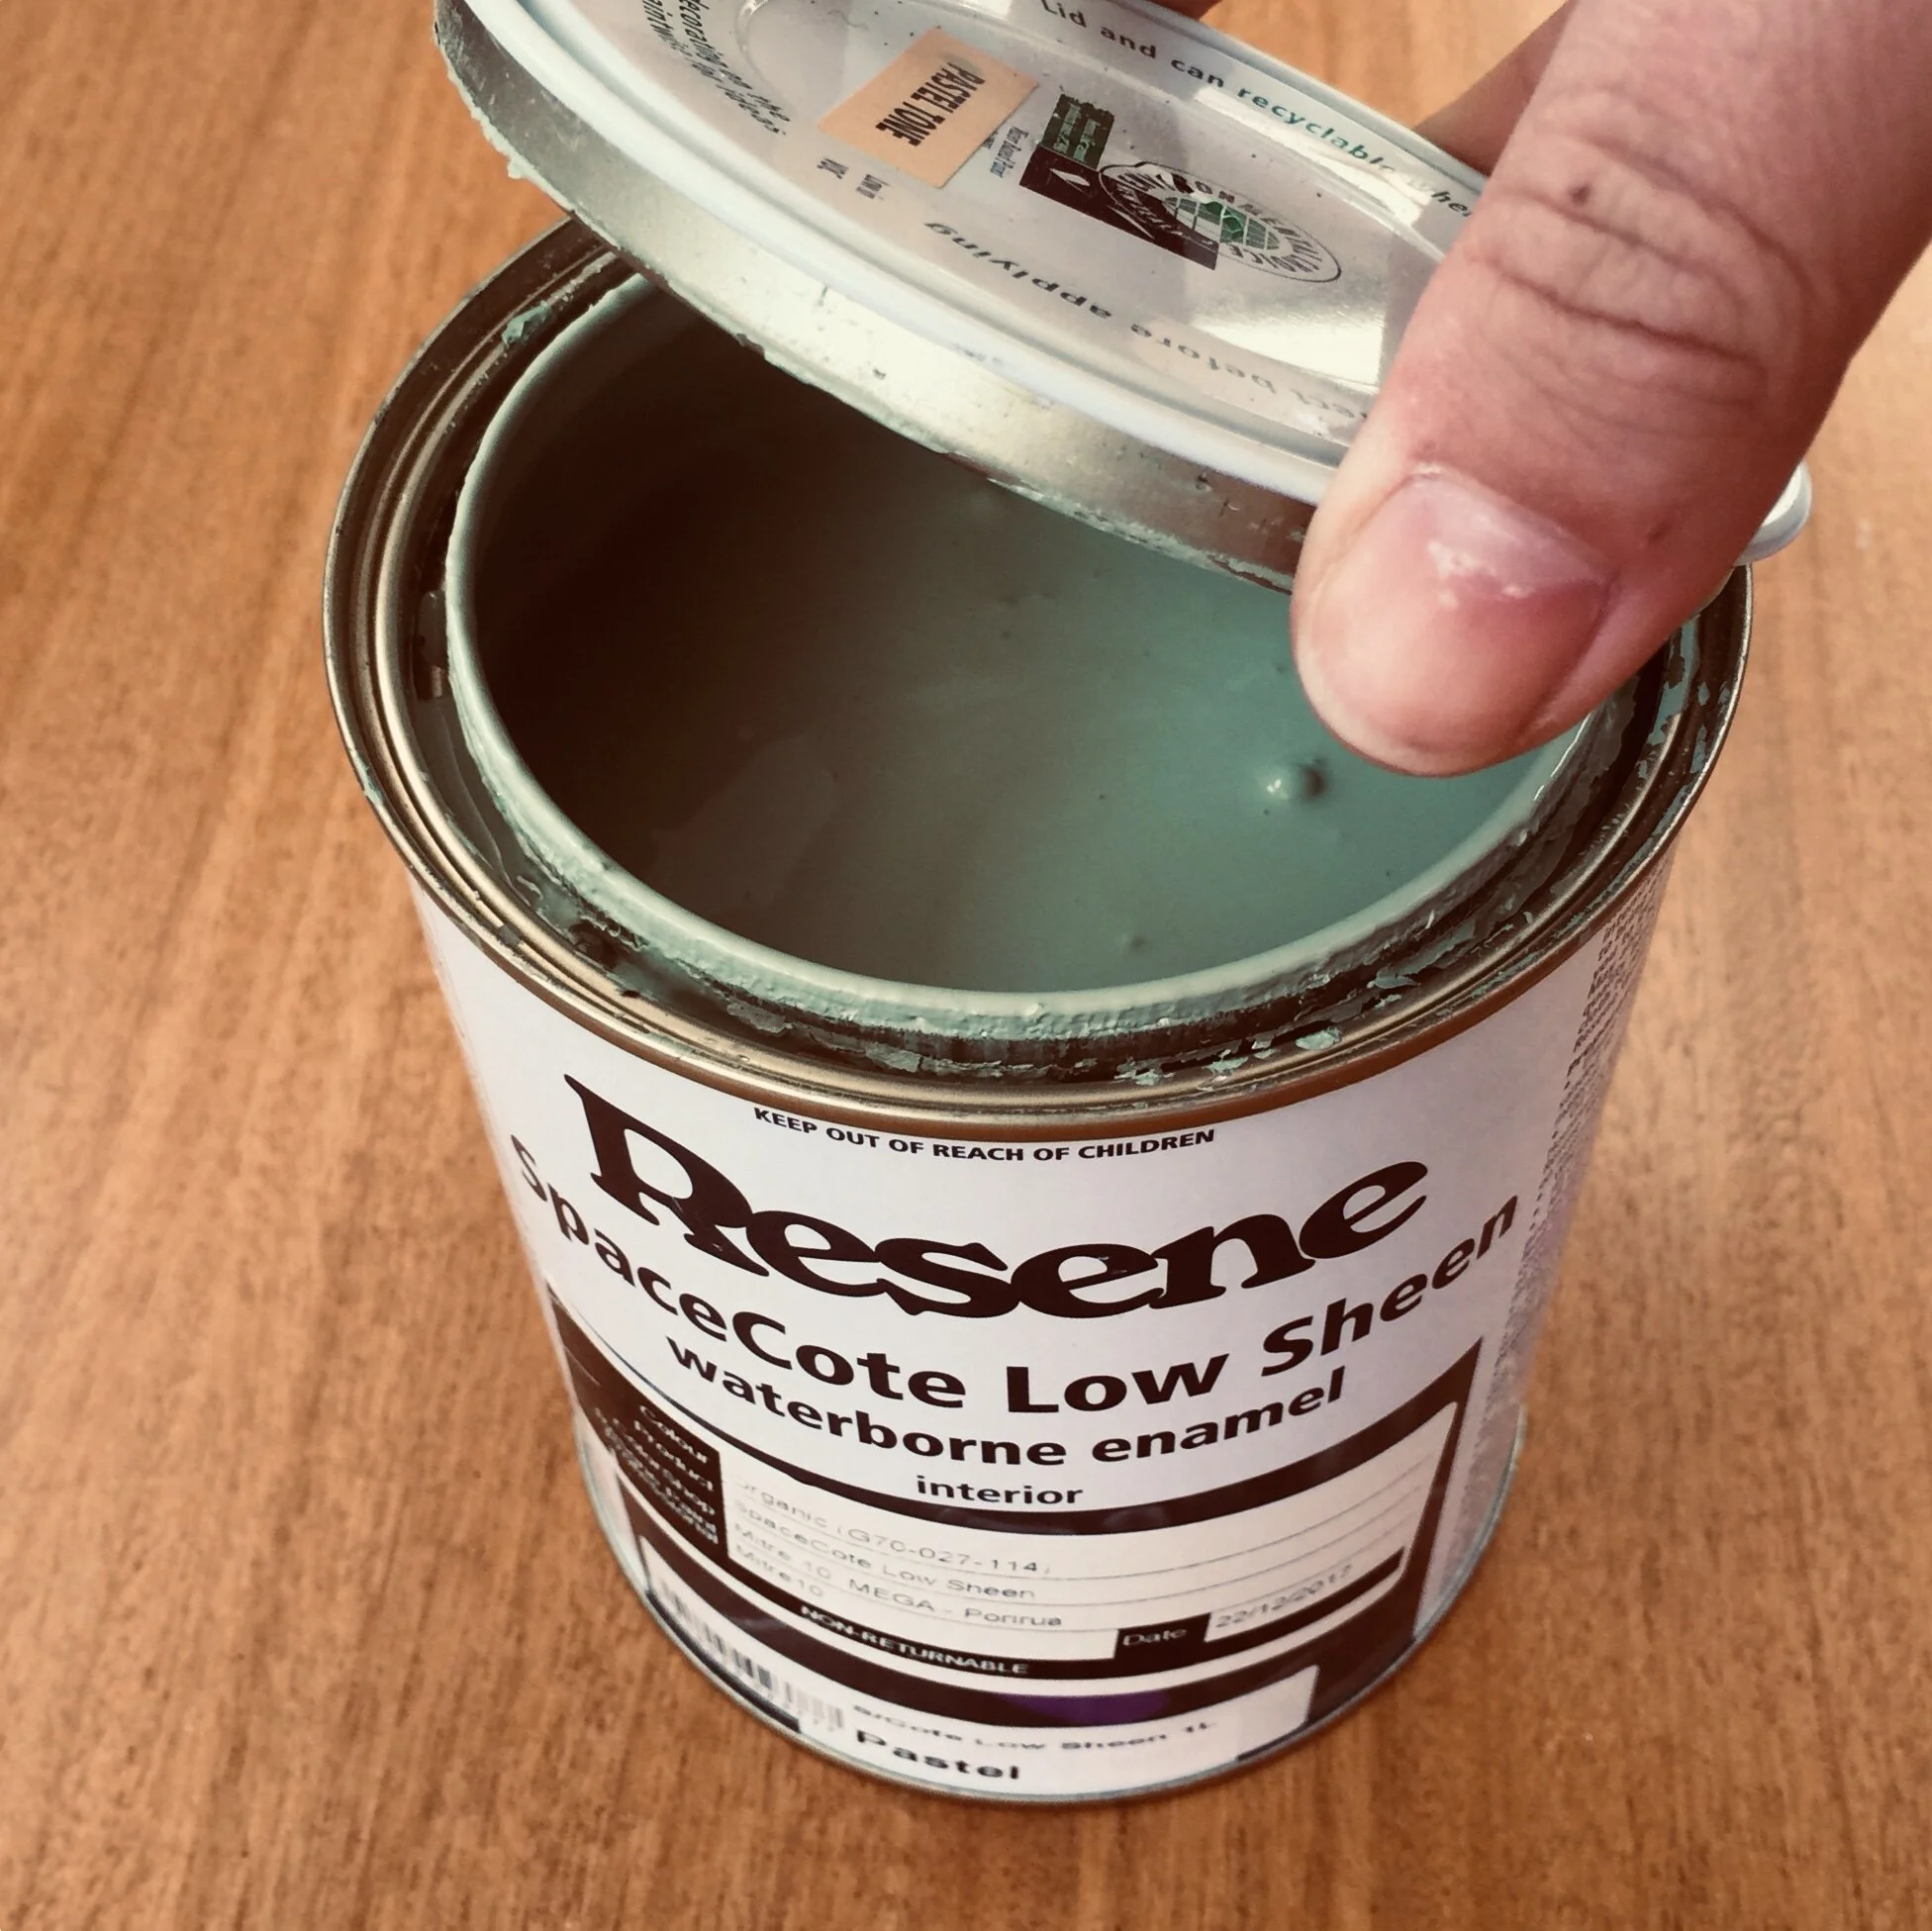
The Resene low-sheen water-based paint we used is very durable and excellent in wet areas. I chose a natural colour palette for the boat interior to bring a botanical feel inside and compliment the ocean scenes outside. You can have some fun too — one of our walls became a chalkboard, which was handy for making notes and leaving nice messages for family onboard.
We bought:
Paint rollers $14.45
Roller sleeves x 3 $19.70
Brush $2.28
Sugar soap $6.98
Paint x 2 1l cans $100.00
Primer $33.00
Sandpaper $10.00
Miscellaneous $8.00
Total cost: $194.41
Pro tip
Use a plastic bag as a paint tray liner to save you washing it between colours, and wrap tinfoil over the roller to keep it from drying out overnight — ready for repainting the next day.
Step 4: Ditch the carpet.
We ditched the carpet which held stains, dampness, salt and sand (and we didn’t want to vacuum!) and repainted in a hard-wearing semi-gloss white. This turned out to make such a big difference — the floors looked clean (and were much easier to keep clean), helped reflect light for a more spacious look and were much more practical for the sea faring lifestyle.
Paint: Semi-gloss enamel paint (white)
Total cost: $45
Pro tip:
Painting the floor a light colour reflects more light and creates a more spacious appearance in a small space.

Before: The grey pattern had to go!

After: Warm hues compliments the natural colours and textures inside.
Step 5: Sew simple upholstery covers.
Whilst we would’ve liked to reupholster the saloon seating, it just wasn’t one of our maintenance priorities, so I bought some calico fabric and sewed some temporary covers.
These were not fancy (I didn’t even photograph the underside) but they were washable and kept our seats cleaner and gave a complimentary colour block throughout the cabin (goodbye retro grey upholstery). I chose a chocolate colour which worked well with the wood tones and natural woven textures throughout the boat interior. This yacht has great natural light so it copes well with a darker base for the seating. It you have a darker interior, you may like to go with a lighter colour fabric.
Total cost: $65
Pro tip:
If you don’t have a sewing machine, or aren’t confident making your own covers, find someone who does and do a trade for something they might need (cooked dinners, or help with one of their jobs are usually welcome!).

After: New modern lights with low power use LED bulbs.

After: Blue light aka disco mode.
Step 6: Upgrade lighting to modern LED fittings.
The saloon cabin top lights had halogen bulbs which we swapped for LED bulbs to save power. In the cabin and toilet, we replaced the old light fittings with new Opal LED lights. This was a straightforward wiring job we did ourselves.
Total cost: $158
Pro tip:
We bought out lights from Burnsco (a local marine store) — they can be pricey so it’s worth the wait until there’s a sale for the extra savings!
Step 7: Bring greenery inside with boat plants.
I don’t care what anyone says about practicality — I love my tiny houseplants onboard! Boat plants make me happier and calmer, which is a good thing (life’s not all smooth sailing!).
When we go sailing, I gather up the few plants I have and put them together in the bathroom sink, or wedged in a bookshelf, and I’ve never had an issue with losing soil when we’re heeled over.
Total cost: $15
Pro tip:
Look for a plant holder that can screw into the wall of the boat. With this secured, and if you keep the soil depth a cm or two below the edge you won’t have a problem on a rough trip.

Before: The v-berth was grubby and messy.

After: Clean, repainted and tidy.

After: Such a pleasure to walk through.

Before: The bulkheads and cupboards were parts of the interior we decided to paint. We removed the old carpet, and repainted the wooden flooring.

After: We loved the overall feeling of minimalist calm with our easy interior makeover.
Summary
Overall project cost: $482.41 NZD ($335 USD)
This interior makeover took us a couple of weeks working at it part-time and we were very happy with the result. It’s amazing how easily a small space is transformed just by cleaning, tidying and changing the base colours of walls and seating. We loved this refresh and found that the natural palette had such a calming vibe that we really enjoyed spending time onboard below.